
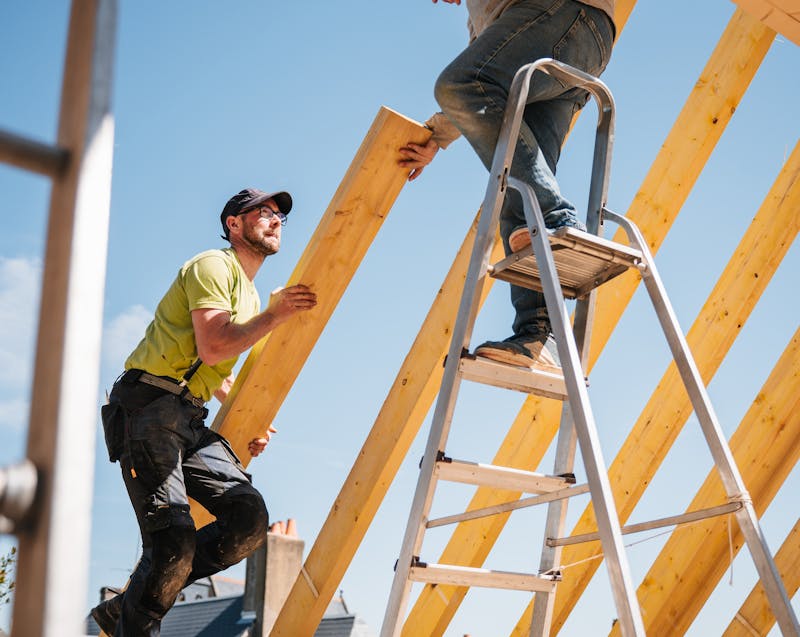
- The right tools—such as roofing hammers, nail guns, and safety harnesses—are essential for efficiency and safety.
- Professional roofing techniques like proper underlayment, flashing installation, and shingle alignment ensure durability.
- Common mistakes to avoid include skipping underlayment, poor flashing, neglecting ventilation, and using cheap materials.
- Regular maintenance—like inspections, gutter cleaning, and trimming branches—extends the lifespan of your roof.
- Safety should always come first; know when it’s smarter to call a professional roofer for complex or risky projects.
Roofing is one of the most essential parts of homeownership—both in terms of protecting your investment and ensuring your family’s safety. Whether you are planning a full replacement or tackling smaller repairs, learning how to do roofing properly can save you thousands of dollars, prevent costly mistakes, and extend the lifespan of your roof. While professional roofers bring experience and efficiency, many homeowners today are eager to understand the basics of roofing themselves—either for small DIY projects or simply to be better informed when hiring a contractor.
This guide will walk you through the essential tools you need, proven techniques professionals use, and the common mistakes you should avoid to achieve durable and effective results.
Why Roofing Knowledge Matters for Homeowners
As a homeowner, your roof is one of your most important assets. It shields your property from the elements, influences energy efficiency, and affects curb appeal. Yet, many homeowners pay little attention to their roof until a leak, missing shingles, or storm damage appears. By understanding how roofing works—even if you never plan to replace your own roof—you gain the ability to:
- Identify potential problems early before they escalate into expensive repairs.
- Communicate more effectively with roofing contractors and evaluate quotes with confidence.
- Perform simple maintenance tasks that extend the lifespan of your roof.
- Save money on small repair jobs by handling them safely on your own.
Roofing is not just about slapping shingles on a roof deck—it’s a combination of precision, technique, and careful planning. In this article, we’ll dive into the exact tools you’ll need, professional techniques to adopt, and the costly mistakes to avoid when tackling roofing as a homeowner.
What Tools Do You Need for Roofing?
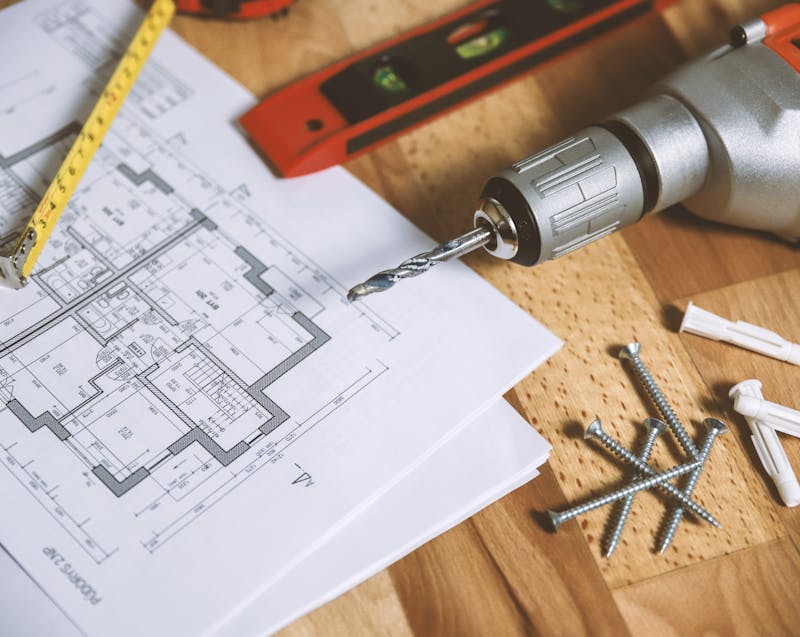
When it comes to roofing, the right tools can make the difference between a quick, clean job and a project filled with frustration and safety hazards. Roofing professionals rely on specialized tools that ensure accuracy, reduce effort, and improve results. If you’re planning to handle even part of the process yourself, assembling a proper roofing toolkit should be your first step.
Essential Hand Tools
- Roofing Hammer or Hatchet – A combination of a hammer and hatchet with a built-in shingle cutter and gauge, designed specifically for roofing.
- Utility Knife with Hook Blades – Perfect for cutting shingles, underlayment, and flashing with precision.
- Chalk Line – Helps you mark straight lines across your roof deck for even shingle alignment.
- Measuring Tape – Ensures accurate spacing and correct dimensions for cuts and material placement.
- Tin Snips – Used for cutting metal flashing or drip edges.
Power Tools and Accessories
- Nail Gun (Roofing Nailer) – Saves time and effort when securing shingles compared to traditional hammering.
- Cordless Drill – Essential for installing fasteners or screws, particularly when working with metal roofing.
- Circular Saw – For cutting plywood decking or trimming lumber when replacing roof structures.
Safety Gear
- Roof Harness and Anchors – Prevent falls when working on steep or high-pitched roofs.
- Roof Brackets and Planks – Provide a stable footing while you move across the roof.
- Work Boots with Traction – Ensure grip and reduce the risk of slipping.
- Heavy-Duty Gloves and Safety Glasses – Protect your hands and eyes from sharp materials and debris.
Additional Materials and Accessories
- Roofing Nails or Screws – Choose galvanized or stainless steel for durability.
- Roofing Underlayment – A protective barrier beneath shingles that prevents leaks.
- Flashing Materials – Directs water away from vulnerable areas like valleys and chimneys.
- Sealant and Roofing Cement – For patching small gaps or securing flashing.
Without the right tools, even the best roofing techniques can fail. Investing in quality equipment ensures efficiency, safety, and professional-level results.
How to Do Roofing Like a Pro: Step-by-Step Techniques
Mastering roofing requires more than tools—it’s about following professional-grade techniques that prioritize safety, durability, and aesthetics. The following steps outline the process experts use when roofing a typical shingle roof.
Step 1: Plan and Prepare
Roofing starts with preparation. Inspect your existing roof, measure dimensions accurately, and calculate material requirements. Ordering 10% more shingles than your calculation allows for waste and mistakes.
Step 2: Tear Off the Old Roof
For a full replacement, strip away old shingles, underlayment, and flashing. This allows you to check for rotting plywood, damaged trusses, or structural weaknesses that need repair before installing a new roof.
Step 3: Install Underlayment and Drip Edge
Underlayment is your roof’s secondary barrier against leaks. Professionals use synthetic or felt underlayment, rolling it evenly across the deck. Along edges, drip edge flashing directs water into gutters, preventing rot along fascia boards.
Step 4: Start with the Starter Shingles
Starter shingles are installed along eaves and rakes to ensure the first row of shingles seals properly and prevents water intrusion.
Step 5: Lay Shingles in Rows
Use your chalk line to maintain straight rows. Begin at the bottom edge and work upward, overlapping shingles according to manufacturer guidelines. Each shingle should be nailed precisely in the designated nailing strip to prevent blow-offs.
Step 6: Install Flashing Around Vulnerable Areas
Flashings go around chimneys, skylights, valleys, and vents. They redirect water away from critical areas. Overlapping flashing pieces and sealing with roofing cement ensures watertight protection.
Step 7: Add Ridge Caps
Ridge caps finish the roof by covering peaks and adding wind resistance. Professionals often cut shingles to size or use pre-formed ridge cap shingles.
Step 8: Final Inspection and Cleanup
Once the installation is complete, walk through the project carefully. Check nail placement, shingle alignment, flashing security, and ensure no exposed fasteners remain. Cleaning up debris, nails, and old shingles ensures safety around your property.
By following these techniques, homeowners can replicate the professional approach, resulting in a roof that not only looks good but also performs well against harsh weather.
What Are the Most Common Roofing Mistakes to Avoid?
Even with the best tools and intentions, many homeowners make critical errors that compromise the effectiveness of their roof. Knowing these common mistakes can save you from costly repairs later.
Installing Shingles Incorrectly
Improper nail placement—such as too high on the shingle—reduces wind resistance and can cause shingles to blow off during storms. Overlapping shingles incorrectly can also lead to water infiltration.
Skipping the Underlayment
Some DIY roofers attempt to save money by skipping underlayment. This shortcut often leads to leaks and water damage. Underlayment is essential for waterproofing and protecting the decking.
Poor Flashing Installation
Incorrect flashing around chimneys, valleys, or vents is one of the top causes of roof leaks. Flashing must overlap properly and be sealed tightly.
Neglecting Ventilation
Roof ventilation prevents moisture buildup, mold, and premature shingle failure. Forgetting to install ridge vents or soffit vents reduces roof longevity significantly.
Using Low-Quality Materials
Cheap shingles, nails, or flashing might save money initially, but they wear out faster and require earlier replacement. Always choose high-quality, weather-resistant materials.
Ignoring Safety Precautions
Skipping safety harnesses or working in unsafe weather conditions can result in severe accidents. Roofing should never be rushed at the expense of personal safety.
Avoiding these mistakes ensures your roofing project lasts longer and provides maximum protection for your home.
How Can Homeowners Maintain Their Roof Like a Pro?
Roofing is not just about installation—it’s about ongoing care. Even a perfectly installed roof will fail prematurely without regular maintenance. Here are professional strategies for maintaining your roof year after year.
Perform Regular Inspections
- Check your roof twice a year—once in spring and once in fall.
- Look for missing shingles, curling edges, or exposed nails.
- Inspect flashing and sealants for cracks or gaps.
Clean Gutters and Downspouts
Clogged gutters can cause water backup and roof leaks. Clean debris regularly to ensure water flows properly away from your roof.
Trim Overhanging Branches
Branches rubbing against shingles can wear them down and break during storms. Keep trees trimmed away from your roofline.
Address Small Repairs Immediately
Small leaks or missing shingles quickly escalate into bigger issues if left unaddressed. Fixing problems early prevents costly damage.
Ensure Proper Ventilation
Check that ridge vents, soffit vents, and attic fans are functioning correctly. Good airflow reduces heat buildup and moisture problems.
By treating your roof like a long-term investment and maintaining it consistently, you’ll maximize its lifespan and performance.
When Should You Call a Professional Roofer?
While many homeowners enjoy DIY projects, roofing carries risks that may not be worth taking. Professional roofers bring experience, safety training, and warranties that DIY work cannot match. You should call a roofing professional if:
- Your roof has a steep pitch that makes DIY work unsafe.
- You notice widespread damage after a storm.
- Structural repairs are needed (rotting decking, sagging trusses, etc.).
- You want to install complex roofing materials like clay tiles or slate.
- You lack the proper tools and safety equipment.
Sometimes, the smartest “DIY” decision is knowing when to hire an expert.
Final Thoughts on How to Do Roofing Like a Pro
Learning how to do roofing like a pro empowers homeowners with the knowledge to make informed decisions, maintain their roofs effectively, and even tackle smaller repair jobs with confidence. The key lies in using the right tools, following proven techniques, and steering clear of common mistakes. While DIY roofing projects can be rewarding, safety and quality should always come first. For large-scale or complex jobs, hiring a professional roofer ensures long-lasting protection for your home.
Your roof is more than just shingles—it’s a system that requires precision, care, and attention to detail. By understanding the essentials outlined in this guide, you’ll not only extend the lifespan of your roof but also safeguard your home for years to come.